
A React-Native Troubleshooting Guide for Android
There you are running, react-native init helloWorld .
Everything bundles so gracefully — an even quickly! You are on a roll and the initial surge of conquering the unknown rushes through your veins. Moments later…
“✨ Done in 8.22s.”,
You grasp the bill of your snapback, rotating it clockwise to 180 degrees, with a slight grin, you type…
cd helloWorld && react-native run-android
…
“BUILD SUCCESSFUL in 16s”
But are things as good as it seems?

After deciding to delve back into react-native after a long hiatus, I realized how daunting it is to work through the tremendous amount of unexpected issues. I was a newcomer all over, again.
So many unknowns, so much magic!
You see no one likes that feeling of coming to a halting screech, immediately at the start of learning something new. It’s discouraging and unsettling, especially as a newcomer.
While you’re inevitably going to run into more ambiguous issues when you attempt to abstract complexity, I’m hoping this guide will at least ease your pain into an exciting new journey.
With that said, this troubleshooting article is going to be specifically targeted to Android and pretty much written simultaneously as I encounter some of my roadblocks. But to be frank, I’m new to Android development, so lots of this stuff is probably going to be redundant for experienced users, so your miles may vary.
While some of these solutions will most likely work on previous and newer versions, this is going to be relevant for the following versions:
https://gist.github.com/bfd39958daf86e9b51b559f1c7b1e45c
Also, I’m going to assume you’ve gone through the fundamental “running on the device” guide from the react-native and getting started docs. This is important as it will show you how to set up your adb, android studio, and devices.
Probably worth noting that I’m also running Mac OS, so there will be some discrepancies.
“It’s impossible to cover all issues, but hopefully with a process of elimination and understanding, you can determine the root cause” - Me
So you’ve ran react-native run-android, and now you are on your simulator and device and you are plagued with a blank screen
 or the Network (Layer 3).
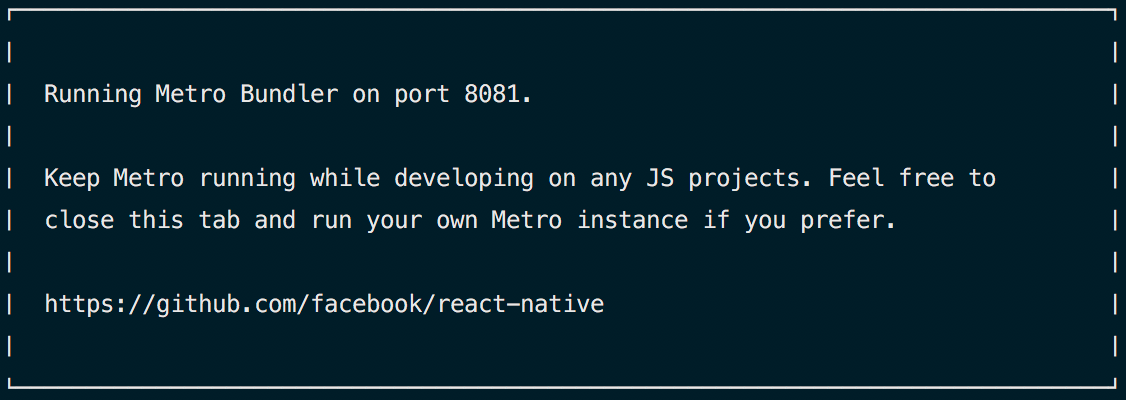
First, ensure your Metro Bundler / React-Native Packager (a bundler that will prepare our JS code and create a usable compiled code for our targeted platform) is running, this is the detached terminal that looks like this:
You can use this troubleshooting flow diagram to figure out where to start
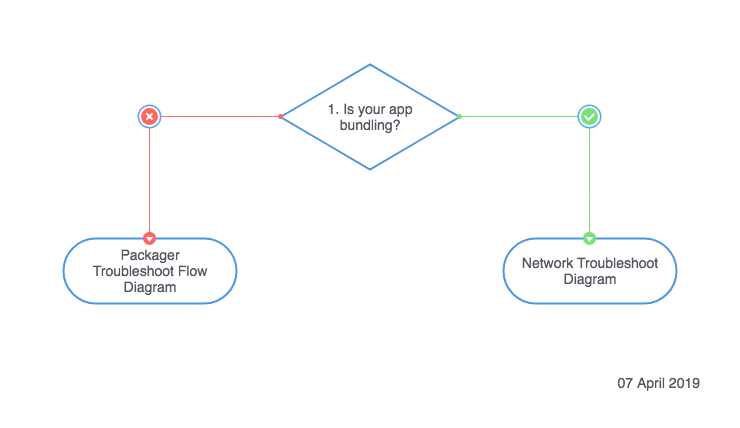
1. Is the app bundling?
Why:
This ensures the bundler is outputting our compiled code, and our android device will render the expected output.
Symptoms:
- My android device has a blank white page
- Loading is stuck on the debug server address
Test:
Go to on our host machine, open up the browser and enter the following URL, http://localhost:8081/index.delta?platform=android&dev=true&minify=false. We should see a bunch of random code appear, if it’s stuck then we know the culprit.
Packager Troubleshooting
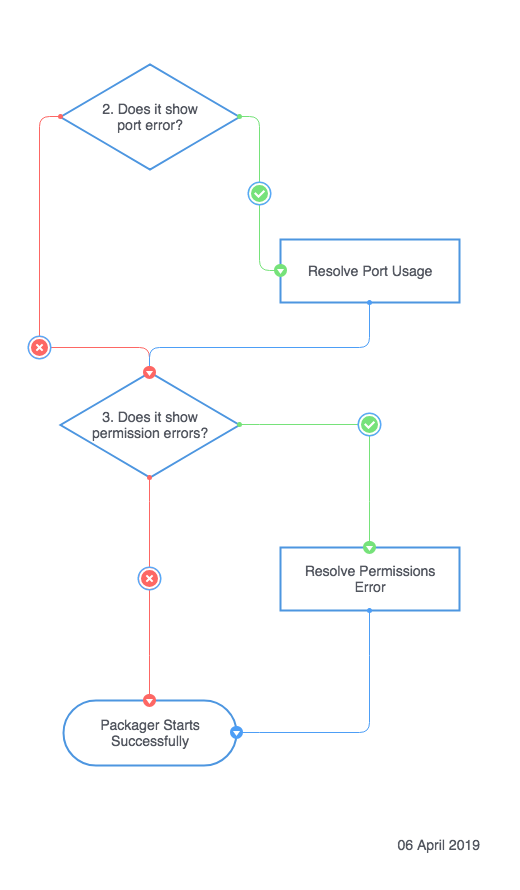
2. Does it show a port related error?
Why:
The packager needs an available port on your host machine (default is 8081), if this is the case you’ll need to free up the default port or set it to a new port. This is also a common port used by McAfee firewall service.
Symptoms:
- Packager won’t successfully run
- Logs will show something similar to: “Port 8081 already in use, packager is either not running or not running correctly”
Solution:
- Eliminate the process using that the port - Official Guide Here
- Specify a different port with the
--portflag:react-native run-android —port 5000
3. Does it show a permissions error?
Why:
The user executing the start scripts don’t have permissions to read, write, and execute the can’t crawl the specified path location. Usually happens when you’ve tampered with permissions, or executing something under sudo.
Symptoms:
- Packager logs will show:
- “ERROR: Unknown option –no-pretty”
- “Watchman: watchman–no-pretty get-sockname returned with exit code 1 ERROR: Unknown option –no-pretty”
- “Unable to talk to your watchman
/ -state/sock! "
Solution:
-
npm r -g watchman brew update && brew upgrade brew install watchman -
Change your user’s permissions of the watchman state directory to rwx (read, write, execute):
chmod 0700 /usr/local/var/run/watchman/<user id>-state
NOTE:
Some may suggestion changing ownership of your
/usr/local, but I would not recommend doing this as you are giving any programs running under your privileges to modify any programs located here. Refer to this StackExchange post for more details.
From here your packager should be able to start up successfully, validate it with step 1. If you are still plagued with packager issues and managed to find a solution, feel free to post it within the comments.
Check if your Android application is running successfully, if not you’ll want to proceed with the network troubleshooting phase.
Networking Troubleshooting
Before getting started, I highly recommend reading the documentation on Android Emulator Networking. Now if you are too lazy to read this, the most important things are the following:
- The emulators sits behind a virtual network in the
10.0.2.X / 24space 10.0.2.2routes back to your HOST machine loopback interface. Traffic sent to emulator flows like such10.2.2.2-> Local machine loopback interface (127.0.0.1)- If you’re behind a corporate network, set proxy in More (three dots in AVD) -> Settings -> Extended Settings (Within Android Studio)
- DNS uses entries listed on
/etc/resolv.conf, and creates up to four DNS servers on 10.0.2.[3 - 6] - Emulator console is accessible through
telnet localhost 5554(first emulator console port is 5554)
Now that’s covered, let’s refer to the diagram below:
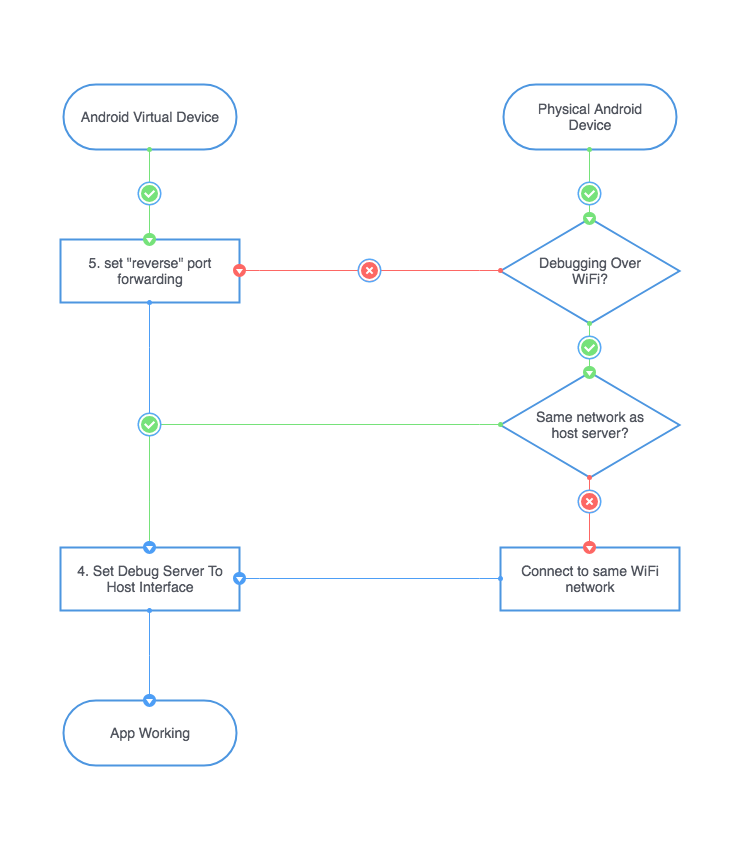
4. Set “Reverse” Port Forwarding
Why:
This will allow us to forward traffic of a specific port from our client (android device) to a host machine port.
In layman terms, any “internet things” that we request on our AVD or connected android device with a specified port, it will be forwarded to our host machine to perform.
Symptoms:
- Connected over USB, but can’t connect
Solution:
- Available on React-Native Docs
- With adb installed, run
adb devices - Grab the device id from the output
- Run
adb -s <device id> reverse tcp:<device port> tcp:<host port>, in this instance, we will want the host port to correspond with the port of packager.
- With adb installed, run
5. Set Debug Server To Host Interface Address
Why:
The react packager allows you to quickly iterate during “development” by serving the bundled code with a web server. If set incorrectly, we will be inadvertently fetching the bundle code from the wrong location causing our app to not load properly.
Symptoms:
- Hanging on “Loading from XX.XX.XX.XX:XXX”
- React-Native logs displays:
- “Timed Out Connection”
- “Could not connect to development server”
Solution:
-
Connected Through USB / Same Local Network
(verify step 4 has been completed)
-
Check on the packager terminal which port you are running (default is 8081), this should say “Metro Bundler Running on port
" Android Virtual Device
- Verify that the top banner of your app that states “connecting to “ matches the correct address: **10.0.2.1:
**
Android Physical Device
- Verify that the top banner of your app that states “connecting to “ matches your local host address: **127.0.0.1:
** or **localhost: **
- Verify that the top banner of your app that states “connecting to “ matches the correct address: **10.0.2.1:
-
If step 2a or 2b are incorrect open the menu by “shaking the device” (on a virtual device, use
Ctrl-M) -
Go to “Dev Settings” > “Set Debug Host & Port for Device”
-
Enter the corresponding address correctly, and hit “OK”
-
-
Connected Through Same WiFi Network of Host
(This is assuming you’ve loaded the development app onto your Android device, and have disconnected the USB Cable)
- Determine your host’s assigned IP address on its en0 interface (for MacOS) by running
ifconfig en0 | grep inet

- Grab the IP address right after inet from the output (in this case 192.168.50.247)
- Go to “Dev Settings” > “Set Debug Host & Port for Device”
- Enter the address you got from step 2 along with the port in a
<IP ADDRESS>:<PORT>format, and hit “OK”
- Determine your host’s assigned IP address on its en0 interface (for MacOS) by running
6. Wi-Fi Related Bonus: It still isn’t working, but know it’s most likely something network related
Why:
There can be times when you are away your standard WiFi network and there are some strict firewall policies.
Symptoms:
- You are over WiFi and working somewhere outside of your typical normal location, but you normally never have problems.
- Your debug server works briefly, but then intermittently stops working. You notice your host IP address has changed
Solutions:
-
Firewall is blocking traffic for that specified port:
- Start the packager on a different port (#2) and apply that port change in your settings (#5)
-
If you notice IP address changes freqently, the DHCP server (how you receive your IP address) may have a weird lease policy or you still can’t manage to get it to work:
-
Use a reverse tunnel to allow you publicly reach your packager web server no matter what network you are on
-
Run
ngrok http <PORT OF PACKAGER> -
Find the ngrok URL used to forward traffic to your webserver located on the line that specifies “Forwarding”

-
Set that URL without the port and http protocol in your “Dev Settings” > “Set Debug Host & Port for Device”. In this case, we would set it to “7383ff09.ngrok.io”
-
Wrapping It All Up
If you’ve exhausted all these potential solutions and are still struggling with getting your app to start properly, then I suggest you resort to the help section in the documentation to determine this next phase of action.
Otherwise, I’m hoping I’ve managed to save you some tears and agony!

Now if you want to see more posts like this or other react-native projects in follow me on any of these venues: